ASUS notebook full hard disk recovery to the original factory state real machine operation, MYASUS IN WINRE recovery, ASUS RECOVERY recovery
Prerequisites for this tutorial: You should have previously backed up the original factory RECOVERY partition, RESTORE partition, and MYASUS partition.
If you don’t have these partitions, you’ll need to either get a copy from a friend with the same laptop model or contact customer support and request restoration of these three partitions. Typically, customer support may skip restoring the restore partition to save disk space, which is nearly 20GB.
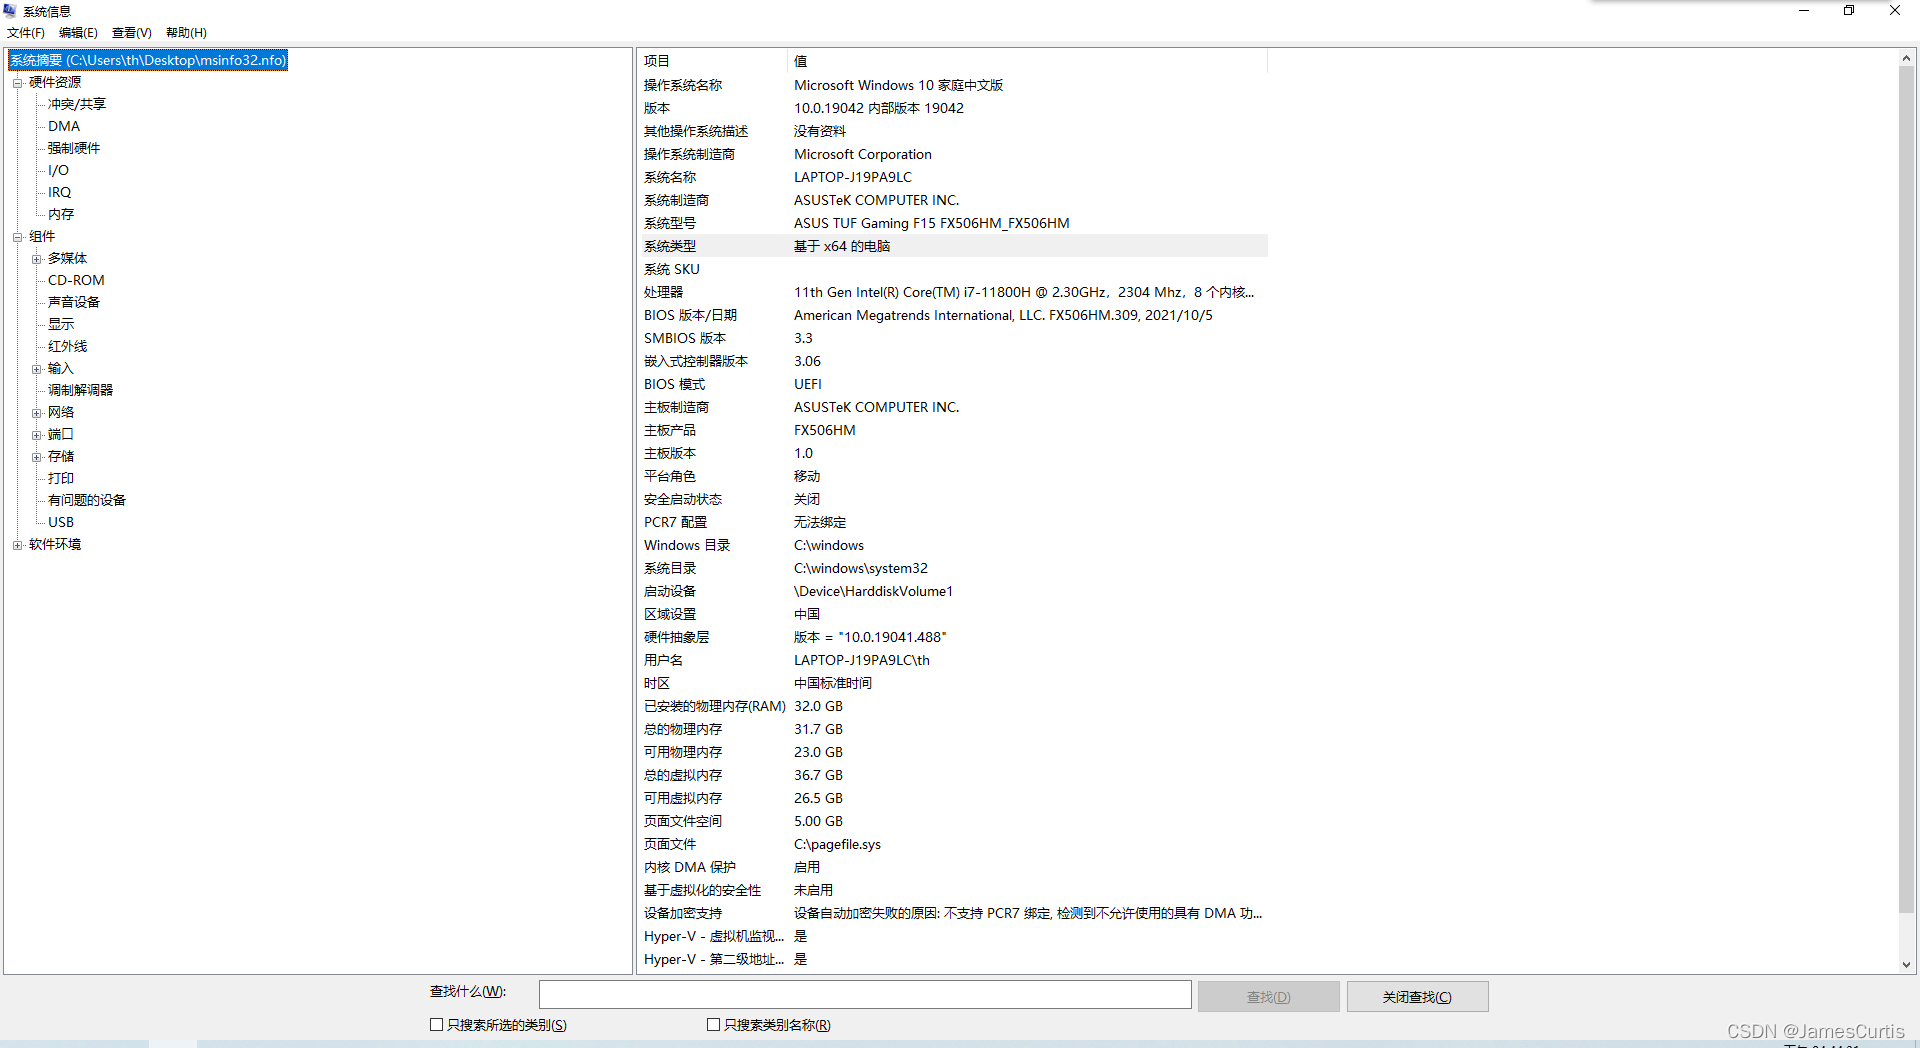
My machine is ASUS TUF Gaming A17 with i7-11800H, RTX 3060, 32GB RAM, and 512GB SSD, model FX506HM.
Here’s my msinfo32: Link
This tutorial will first explain how to perform a full format, and I’ll cover how to do it without formatting next time. Let’s get started.
First, prepare a bootable USB drive or external hard drive with a PE (Preinstallation Environment). There are many tutorials online on creating a PE bootable drive; I won’t go into details here. I used “优启通” for creating my PE, as I found it more feature-rich than “WEPE.”
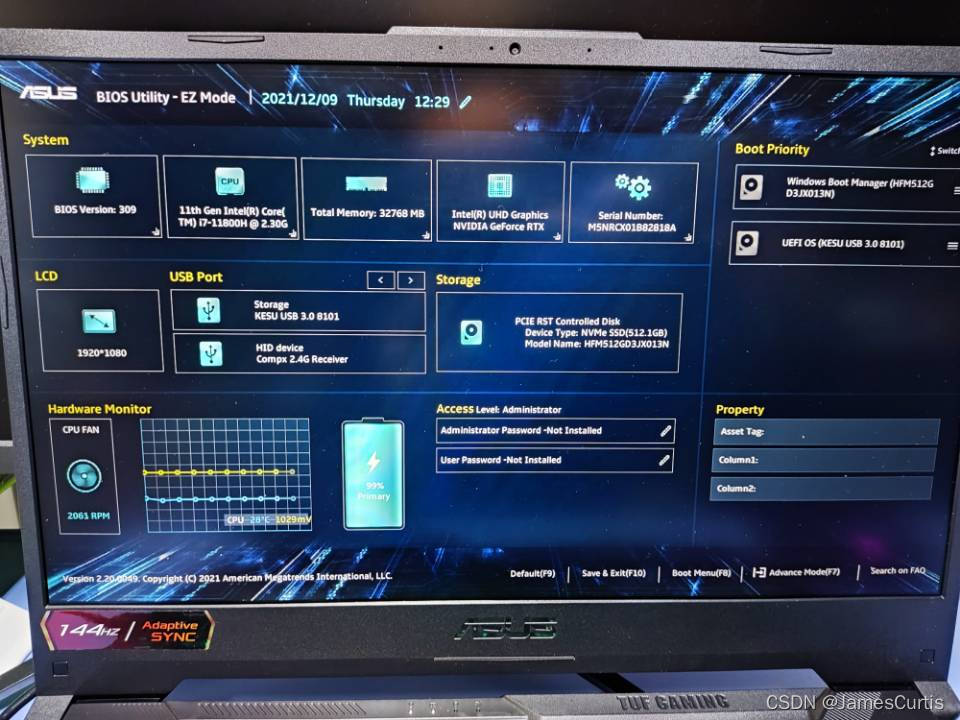
- Insert the USB drive (or external hard drive), then boot or restart your computer and repeatedly press F2 to enter the BIOS.
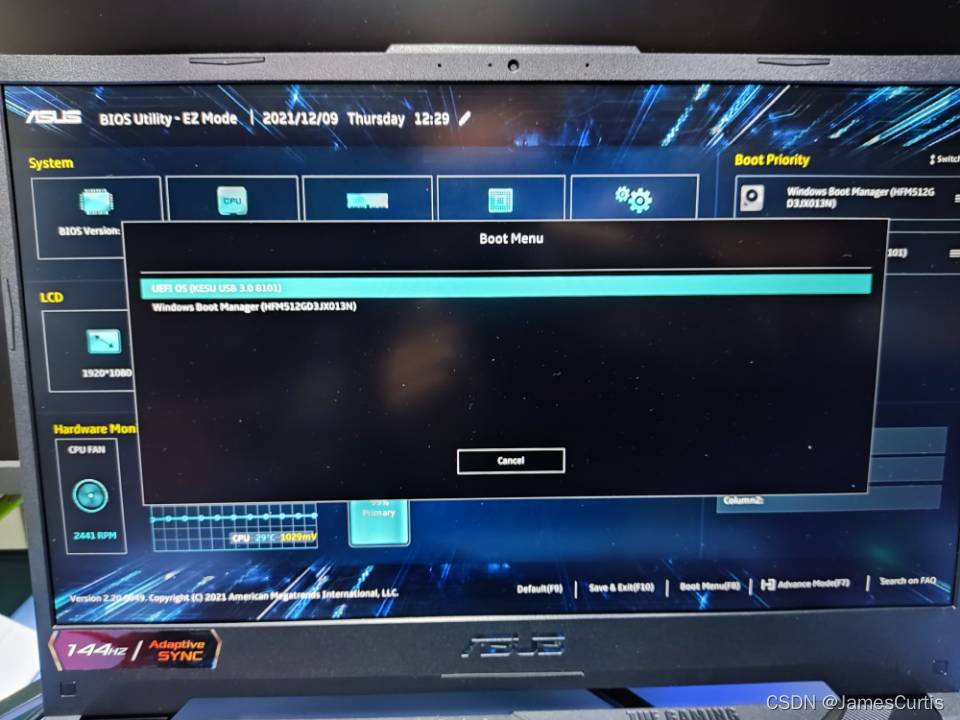
- Press F8 to enter the PE environment.
- Partition your drive to match the factory configuration.
I have backed up the factory partition table, so you can follow it for partitioning.
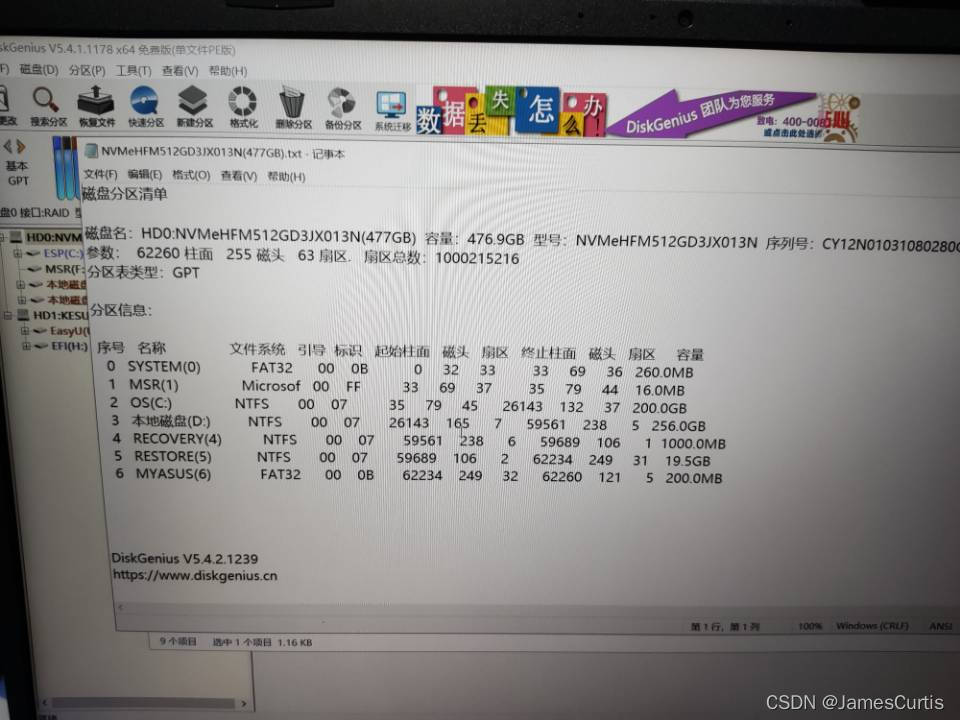
You can ignore the “Local Disk D” and merge it into the OS. I created this local disk D shortly after getting my machine using Windows’ built-in disk management tool because I prefer not to have such a large C drive.
① Start by creating a partition.
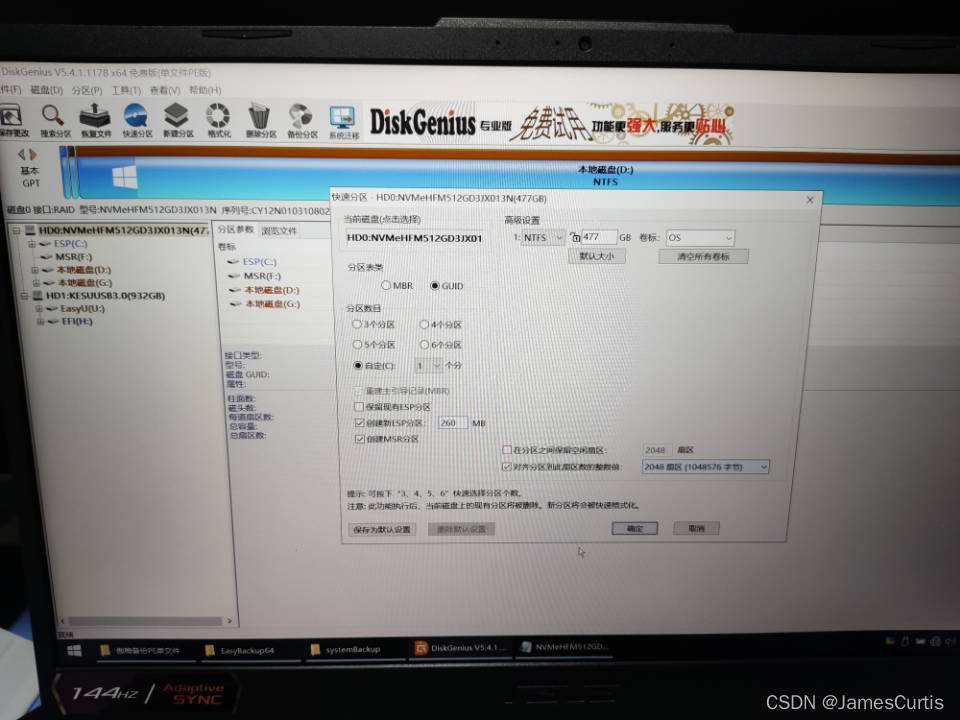
Then adjust the OS partition to shrink it to 200GB because we don’t know how much space we’ll need later.
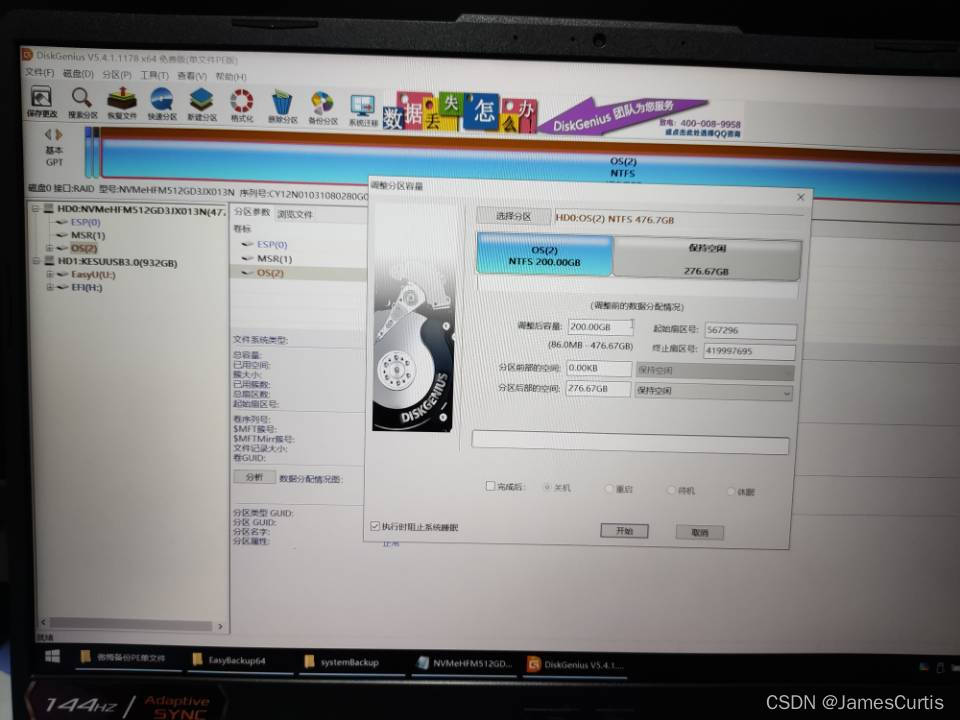
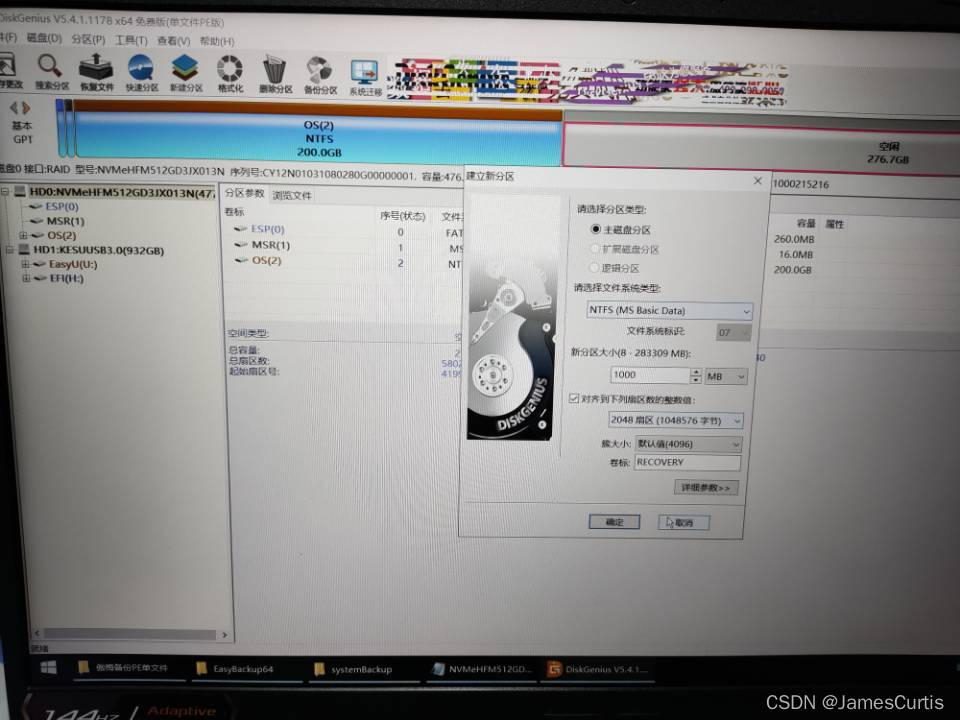
Next, create the RECOVERY, RESTORE, and MYASUS partitions.
- RECOVERY partition is 1000MB.
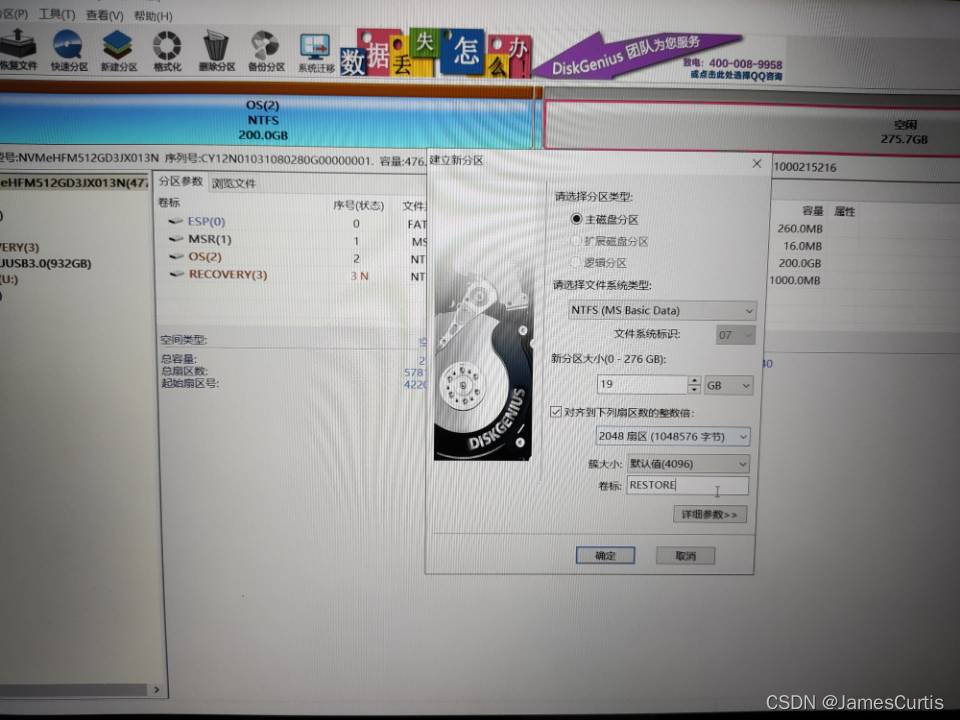
- RESTORE partition is 19.5GB (approximately 19968MB).
- MYASUS partition is 200MB.
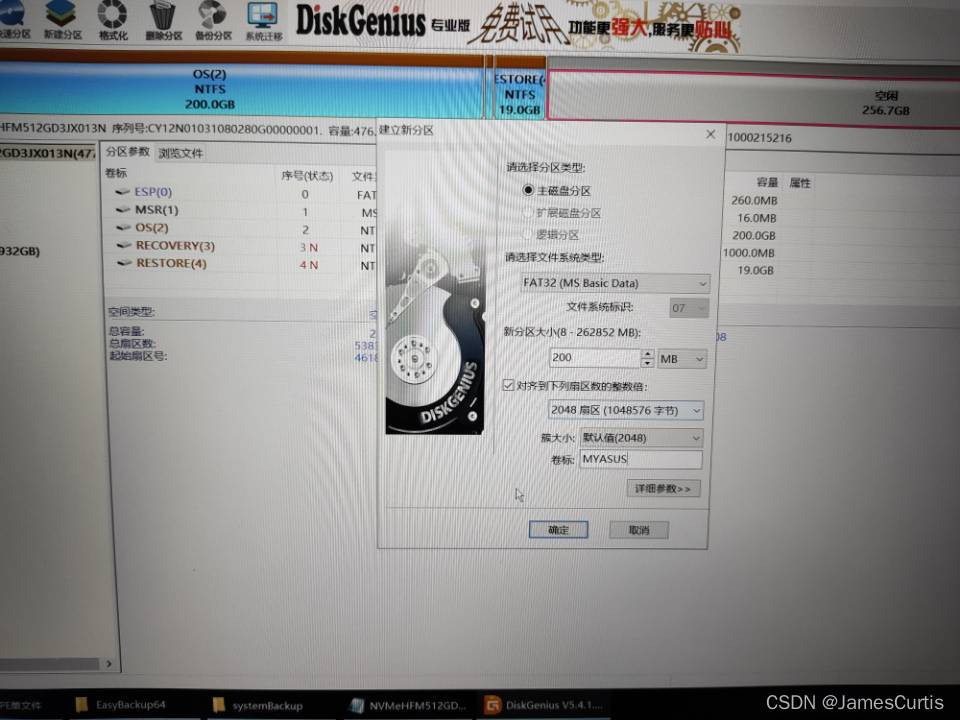
Save the changes and allocate the remaining space back to the OS partition.
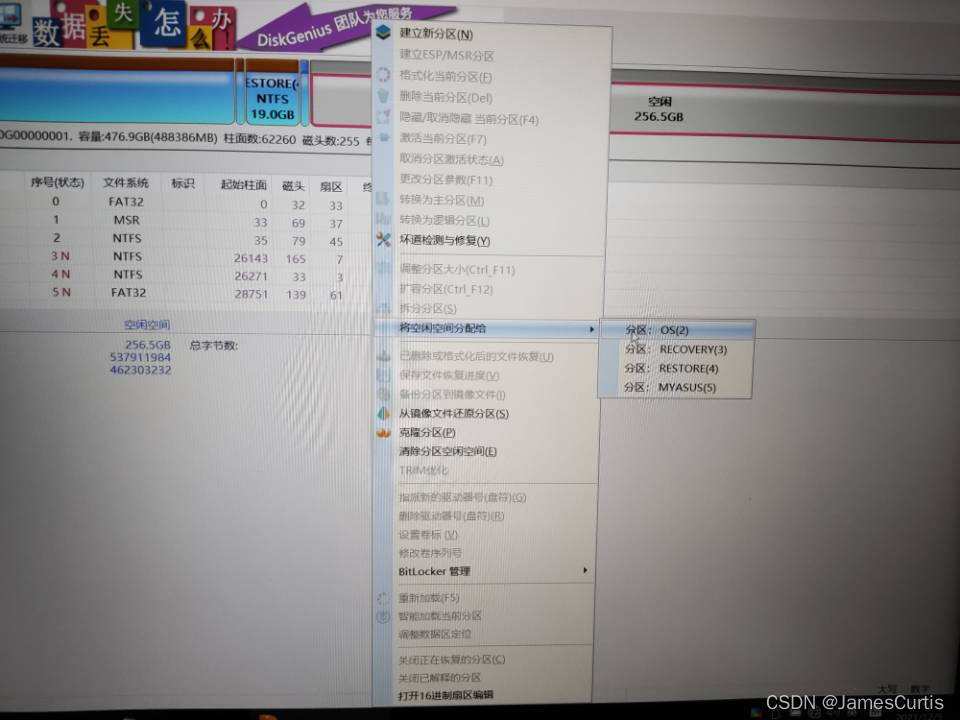
- Restore backups for each partition.
Use DiskGenius to restore the RECOVERY, RESTORE, and MYASUS partitions.
Then open DISM++, go to “File” > “Release Image,” and this step will restore the factory system.
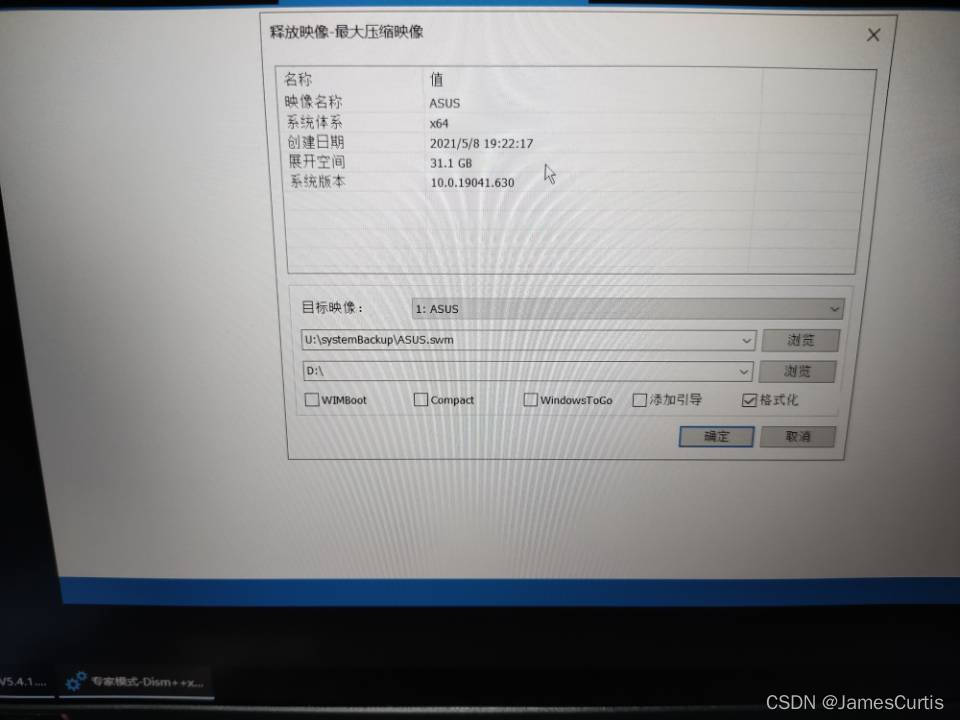
At this point, your computer may not be able to boot. Next, we will rebuild the bootloader.
Go back to DiskGenius and assign a drive letter to the ESP partition and the OS partition.
(Right-click on a partition, and you will find the option to assign a drive letter.)
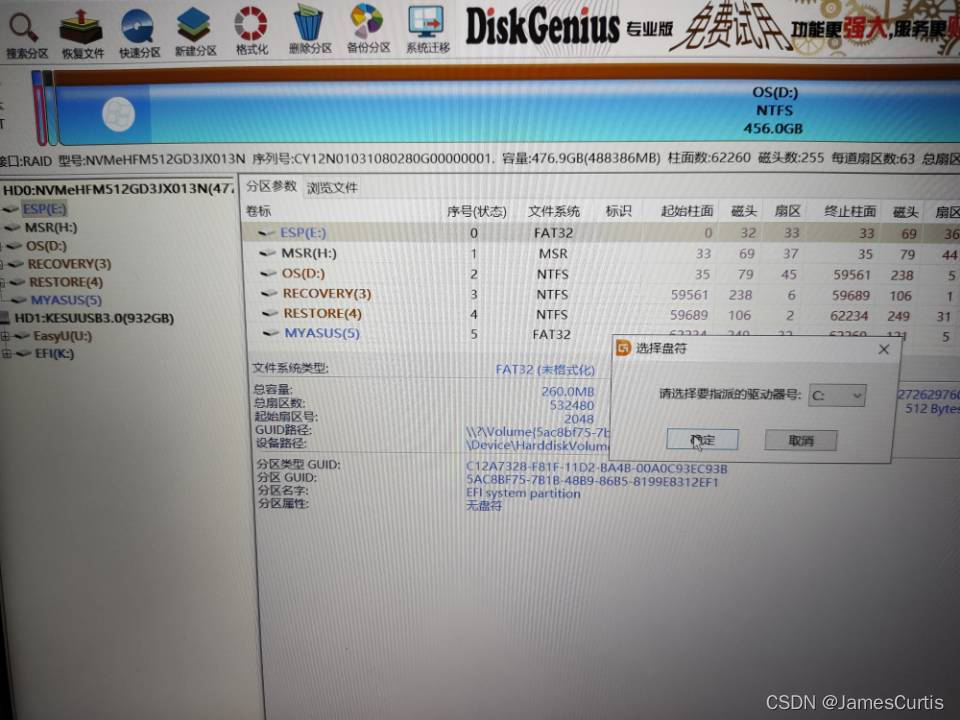
Type “cmd” into the Run dialog (Win+R).
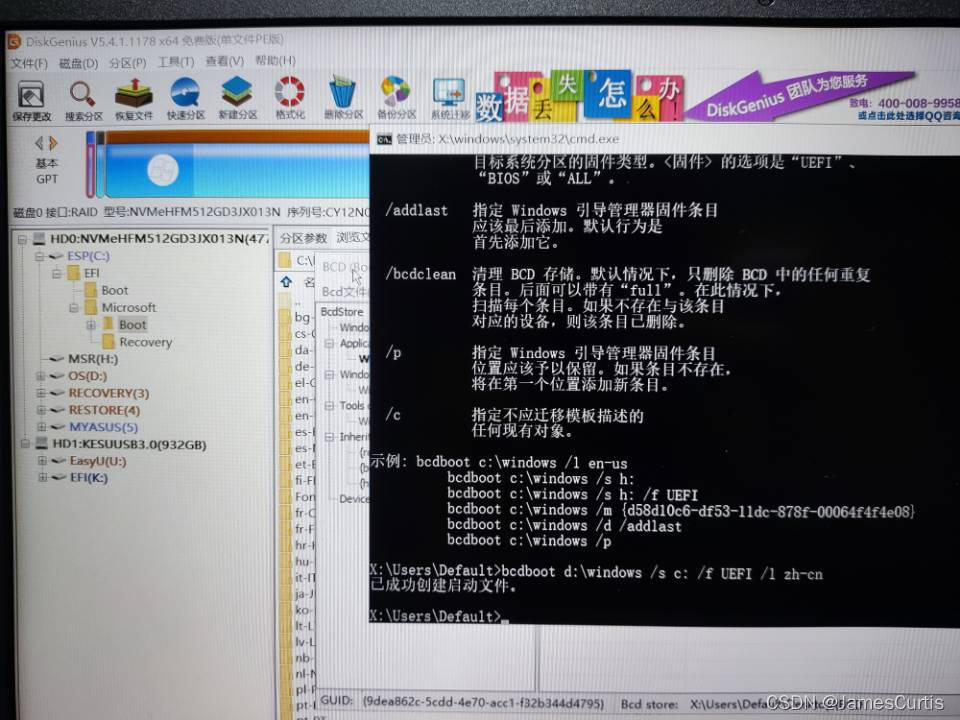
Enter the following command:
1 | bcdboot d:\windows /s c: /f UEFI /l zh-cn |
Here, “d:\windows” should match the drive letter assigned to your OS partition, and “c:” should match the drive letter assigned to your ESP partition.
- Some finishing touches before booting up.
I forgot to mention a step earlier, but you can do it here.
Right-click on the ESP partition and set the label to “SYSTEM.”
Right-click on the RECOVERY partition and change the partition parameters.
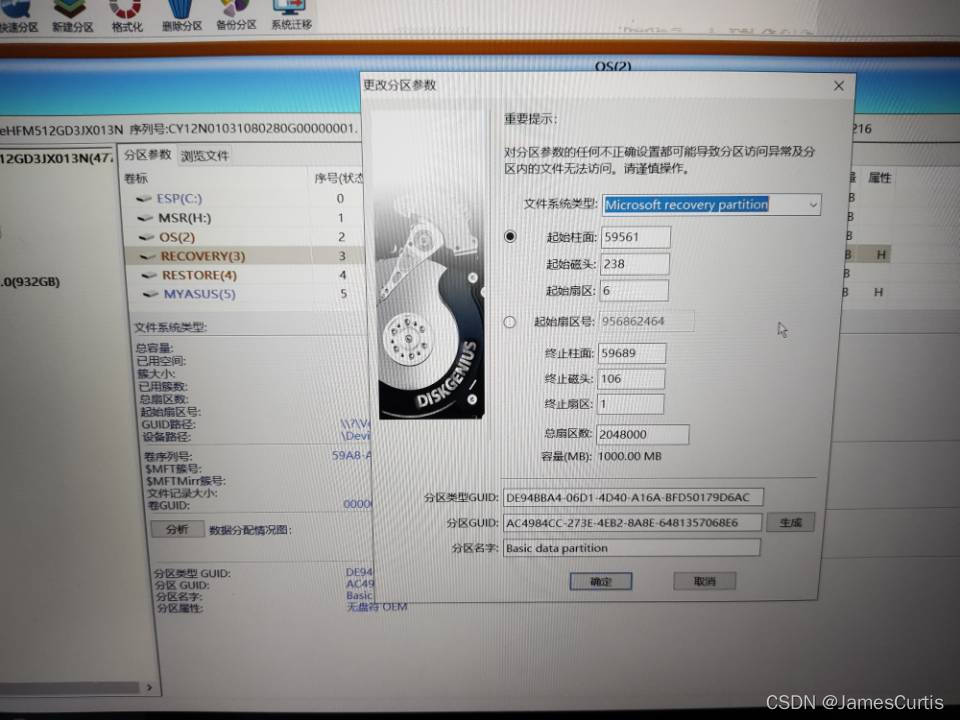
Change the file system type to “Microsoft recovery partition,” and leave the other settings unchanged.
Repeat the same operation for the RESTORE and MYASUS partitions, modifying their file system types.
- Restart to configure WinRE for the current system.
Restart your computer and continuously press F2 to enter the BIOS.
Adjust the boot order in BIOS.
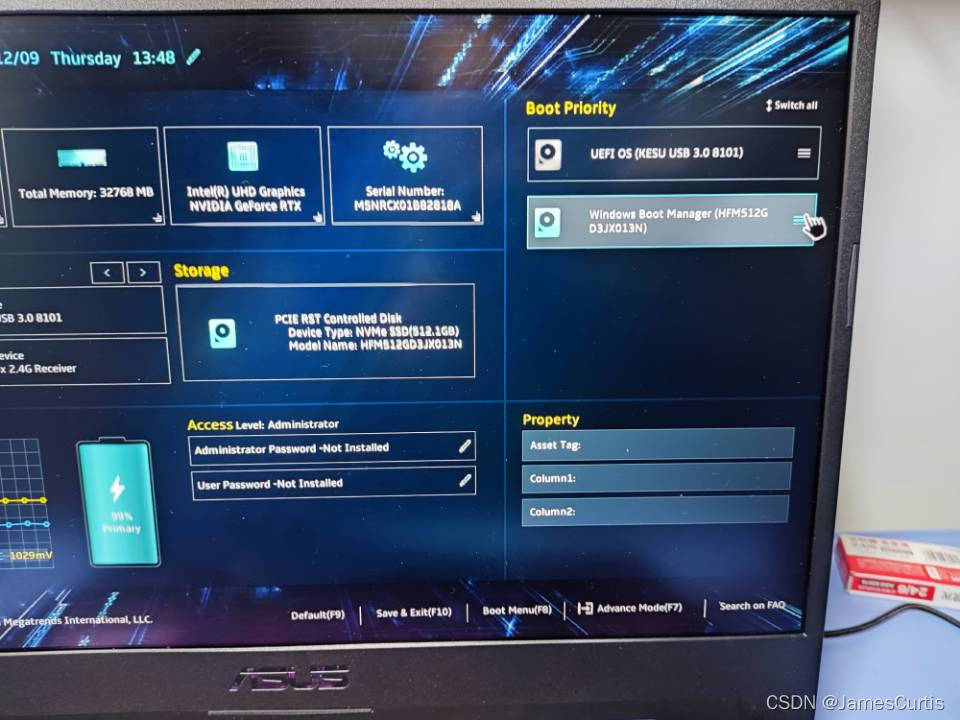
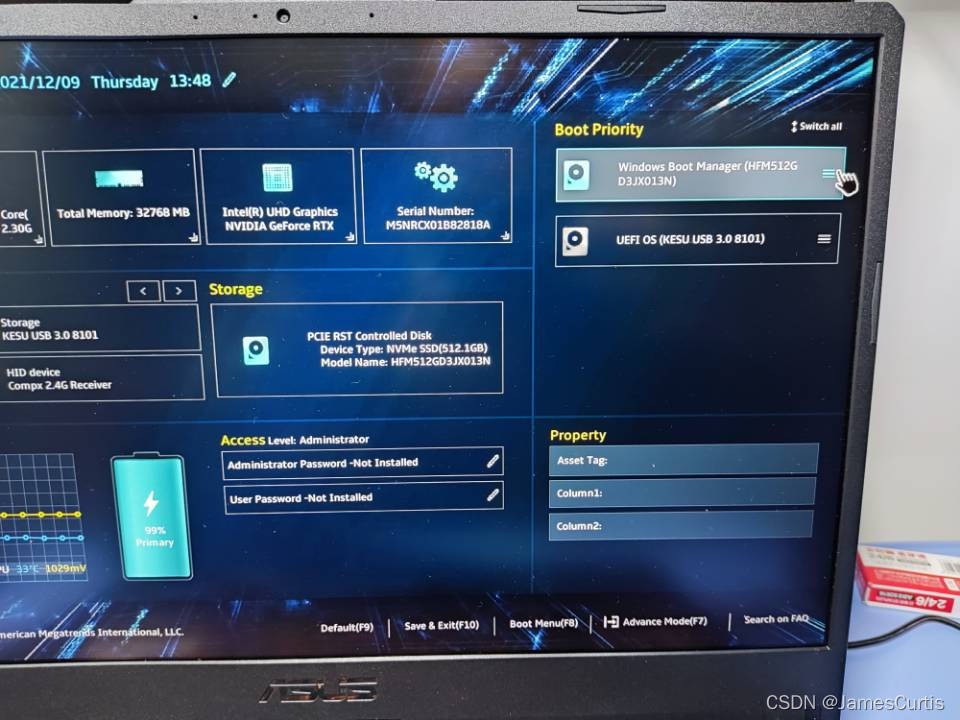
Save and exit by pressing F10. Your motherboard may power off briefly at this point; you can remove the USB drive quickly (it’s not necessary to unplug it).
- Configure WinRE for the current system.
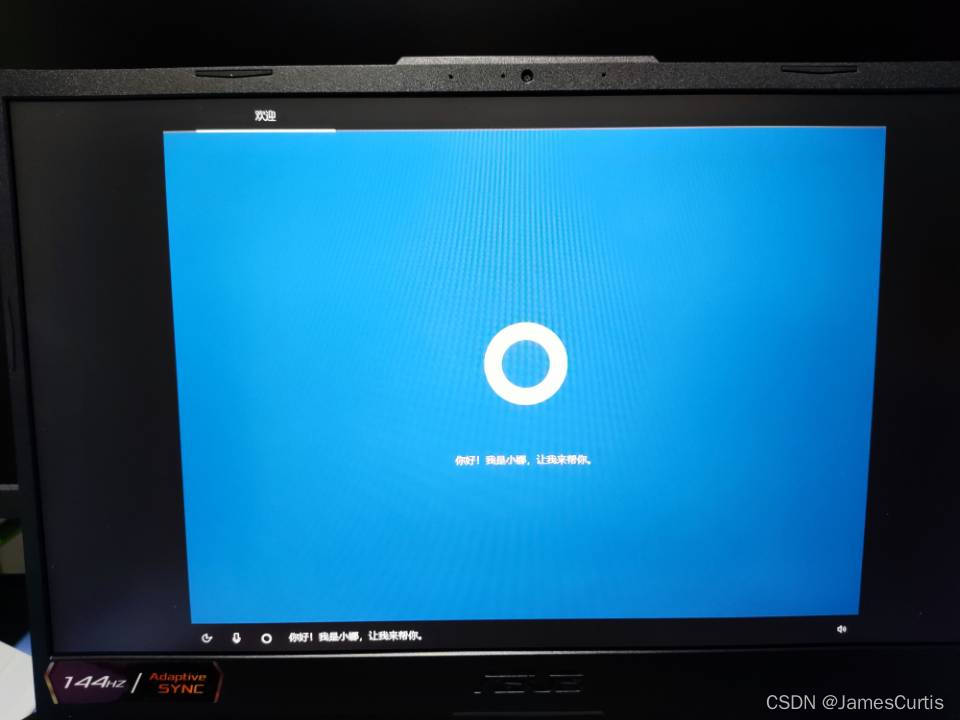
After restarting, you’ll see this screen.
After performing some operations, you should be able to enter. Open “cmd” as an administrator:
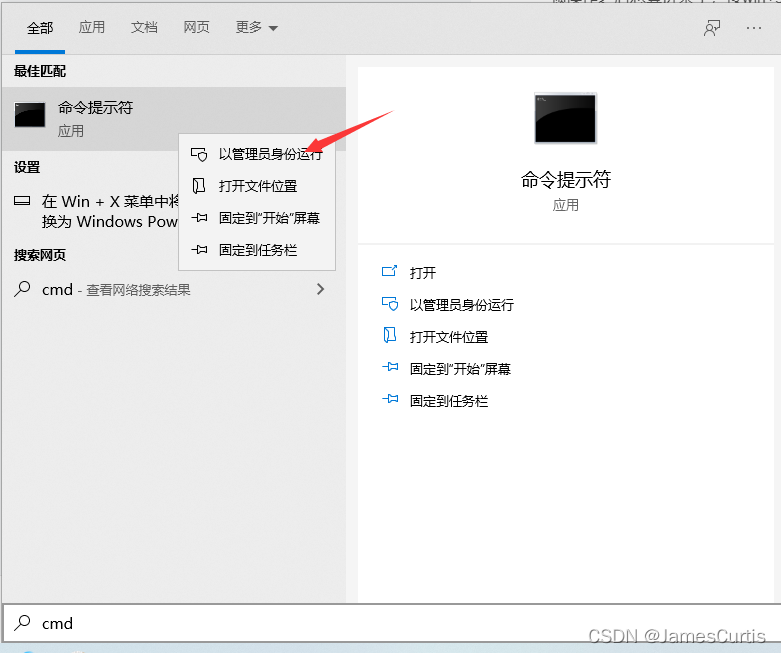
Enter the command:
1 | reagentc /info |
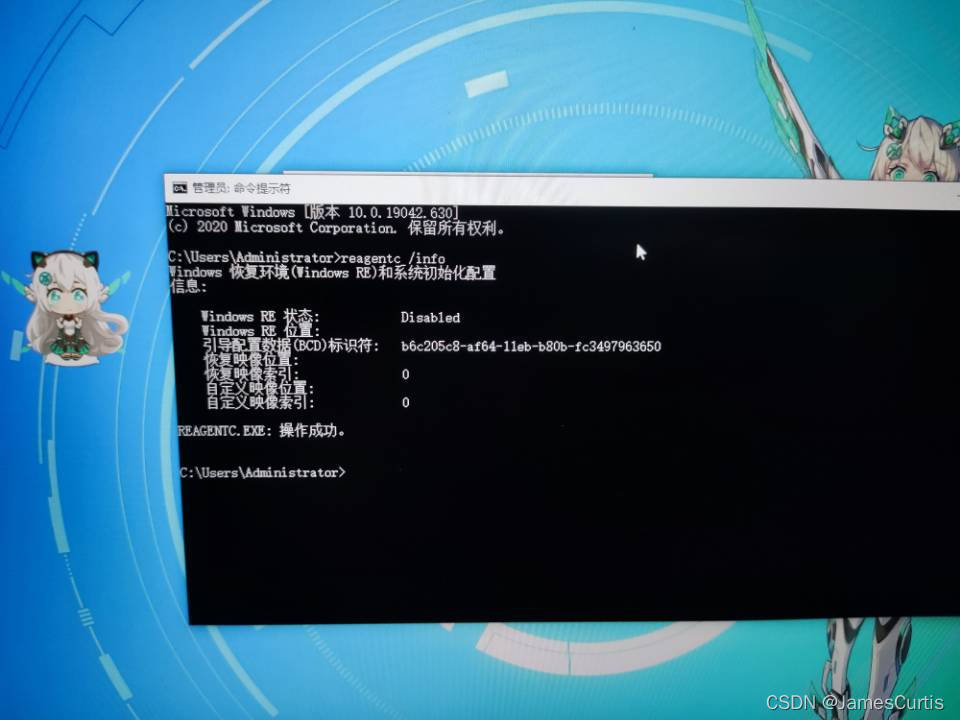
You should see “disabled,” indicating that it’s normal.
Then, modify your file explorer settings to show hidden files and file extensions:
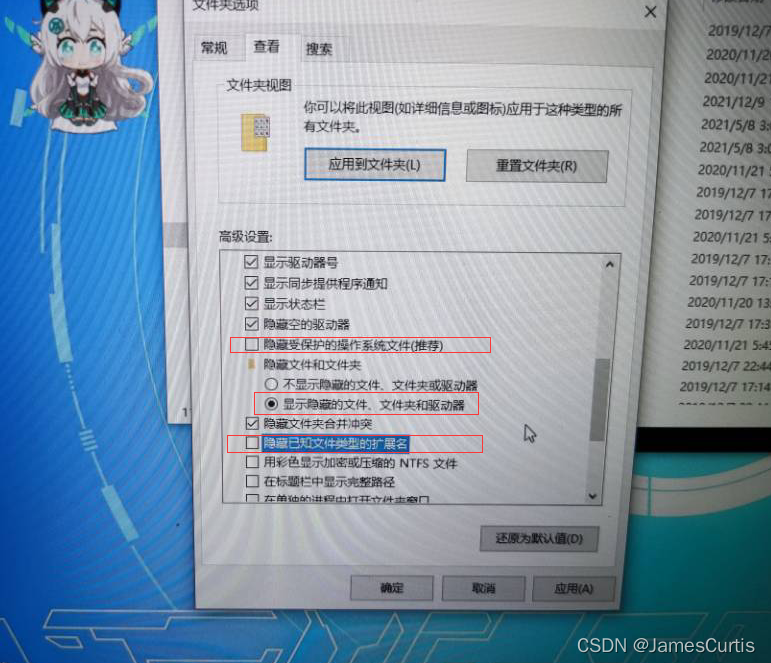
Next, specify the image path for WinRE. In the command prompt, enter:
1 | reagentc /setreimage /path [the path you copied earlier] |
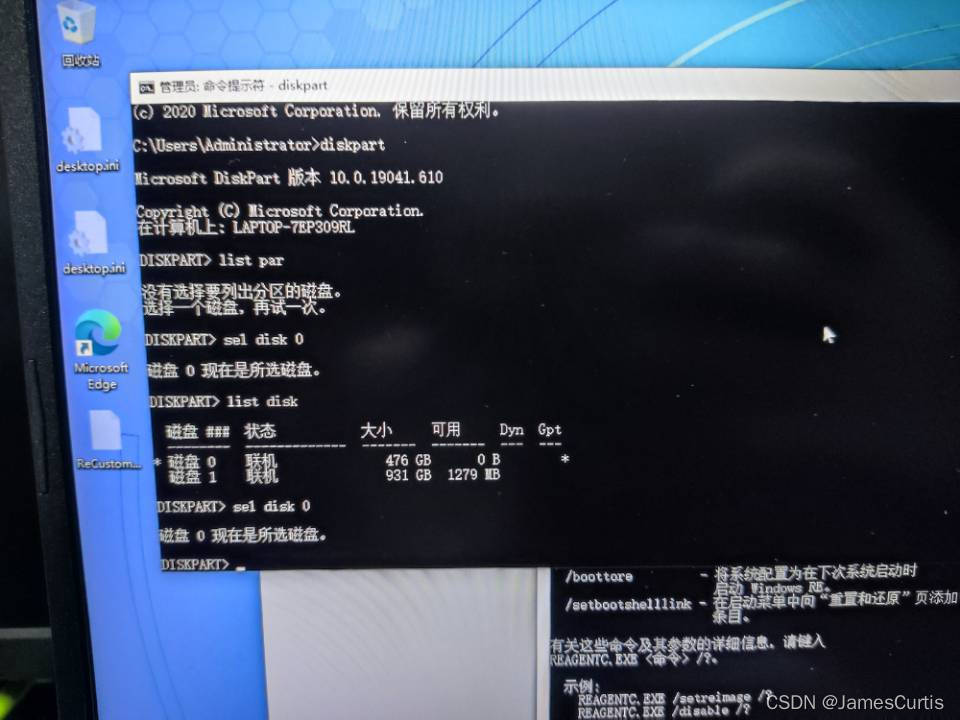
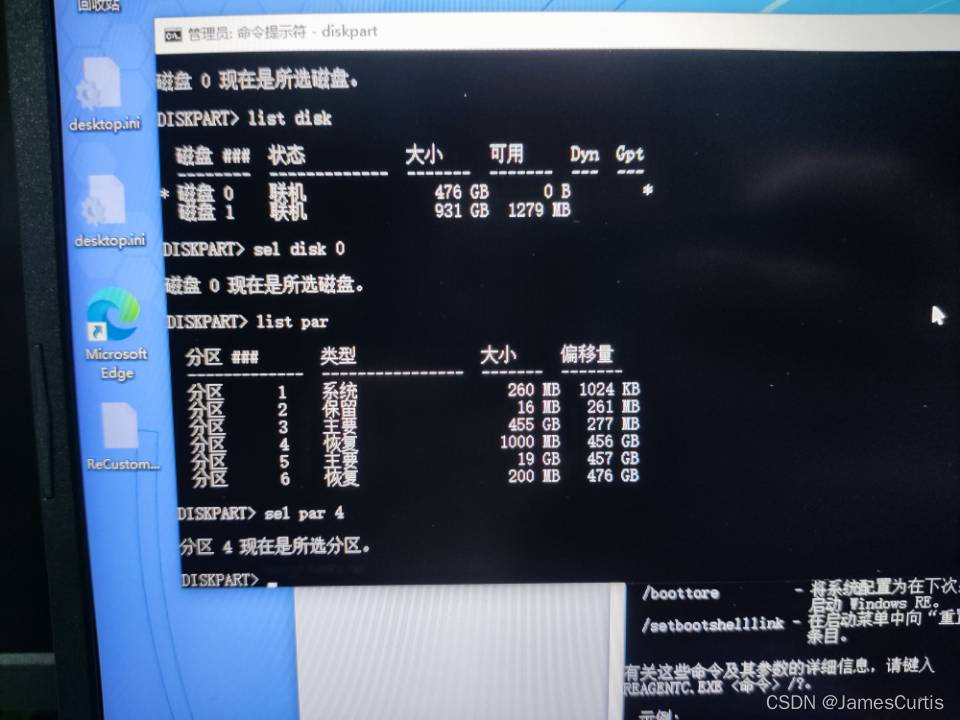
Now, WinRE is configured for your current system. You can enable it by entering:
1 | reagentc /enable |
If everything goes well, you’ll see a brief pause followed by a successful operation message. You can verify the status with:
1 | reagentc /info |
Don’t worry; we’re almost there. There’s one more step to write the MYASUS entry into WinRE.
Copy this file to your desktop:
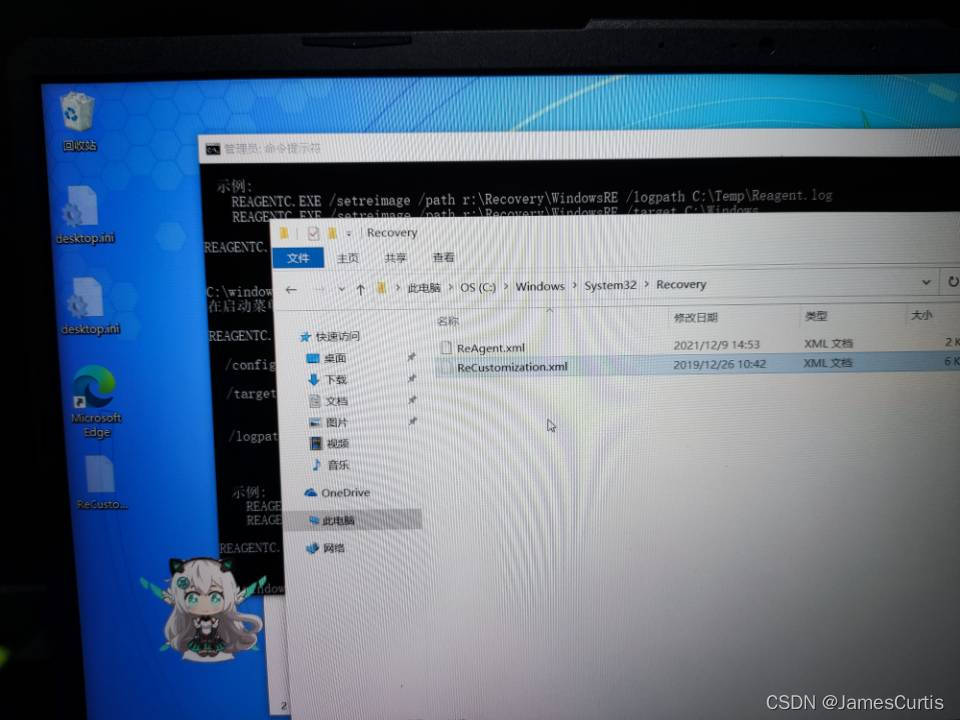
While holding Shift, right-click to copy the file path:
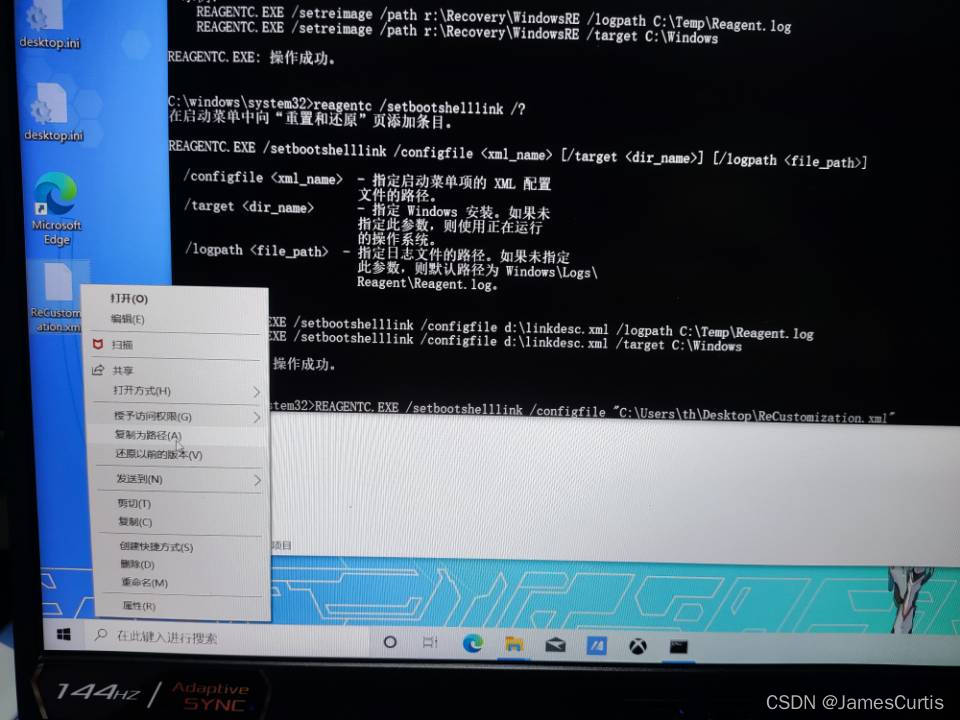
Now, in the command prompt, enter:
1 | reagentc /setbootshelllink /configfile [the path you copied earlier] |
With this, you’ve configured MYASUS in WinRE. Now, when you restart your system and enter WinRE, you’ll find the MYASUS entry.
- Configure WinRE in asus.sum.
Click the left-pointing arrow:
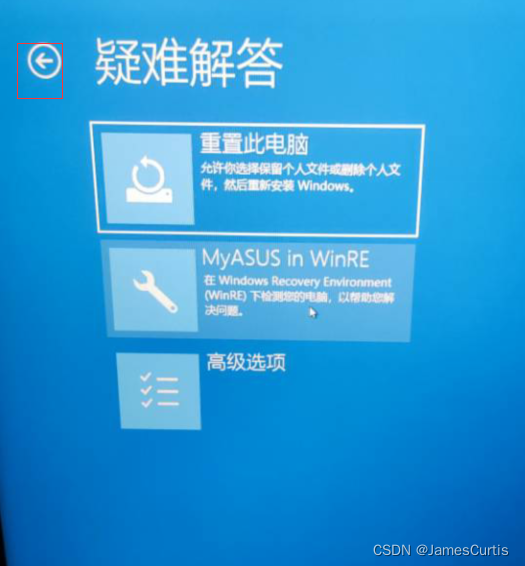
Choose “Continue with Windows 10.” Your computer will probably restart; enter BIOS by pressing F2 and then enter PE.
Open cmd, navigate to the drive where your OS is located (e.g., D drive), and create a directory:
1 | md d:\mount |
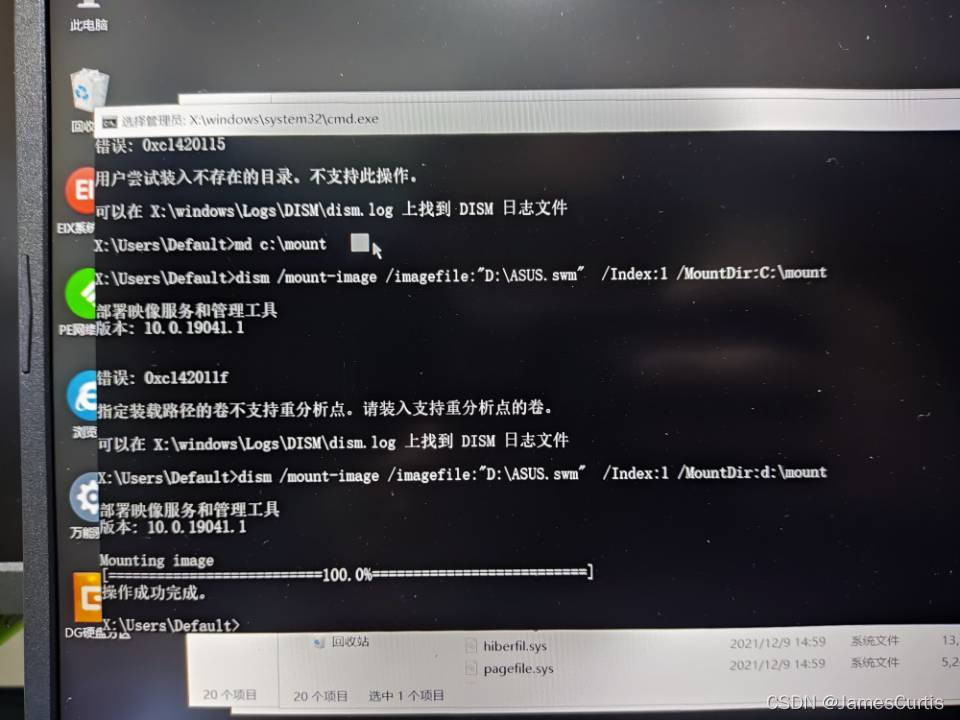
Mount asus.sum to this directory with the following command:
1 | dism /mount-image /imagefile:[your asus.sum path] /index:1 /MountDir:d:\mount |

Next, copy the ReAgent.xml you configured for your current system into the corresponding location in this mounted image. The path should be like this: d:\mount\Windows\System32\Recovery\ReAgent.xml.
After copying, unmount and save the changes with this command:
1 | dism /Unmount-image /MountDir:d:\mount /commit |
Now, you’ve modified the image. Replace the RESTORE partition’s image with this one (I used a copy of the image on my external hard drive; if you modified the image directly in the RESTORE partition, you don’t need to replace it).
That’s it! The modifications are complete. After resetting your system with ASUS recovery, the MYASUS entry in WinRE should be present.
The rest of the steps are optional and involve configuring backups using a third-party tool.
- Restart your system and enter MYASUS in WinRE, then use AoMei Backupper to back up your entire hard drive.
Make sure to remove the USB drive when restarting and press F12 to enter WinRE.
Select MYASUS in WinRE.
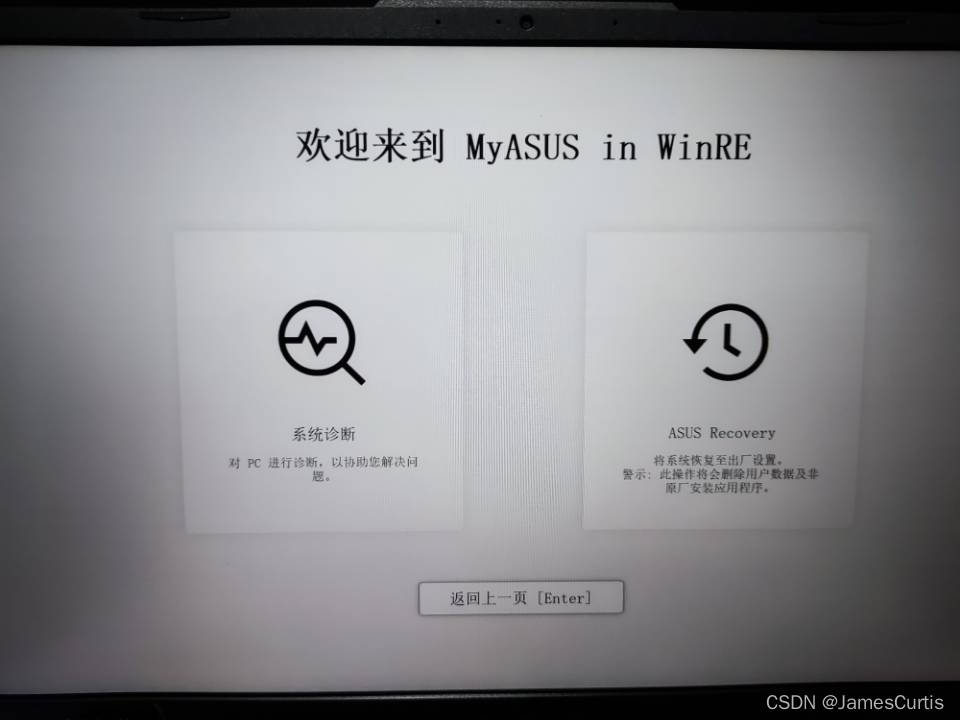
Choose ASUS recovery.
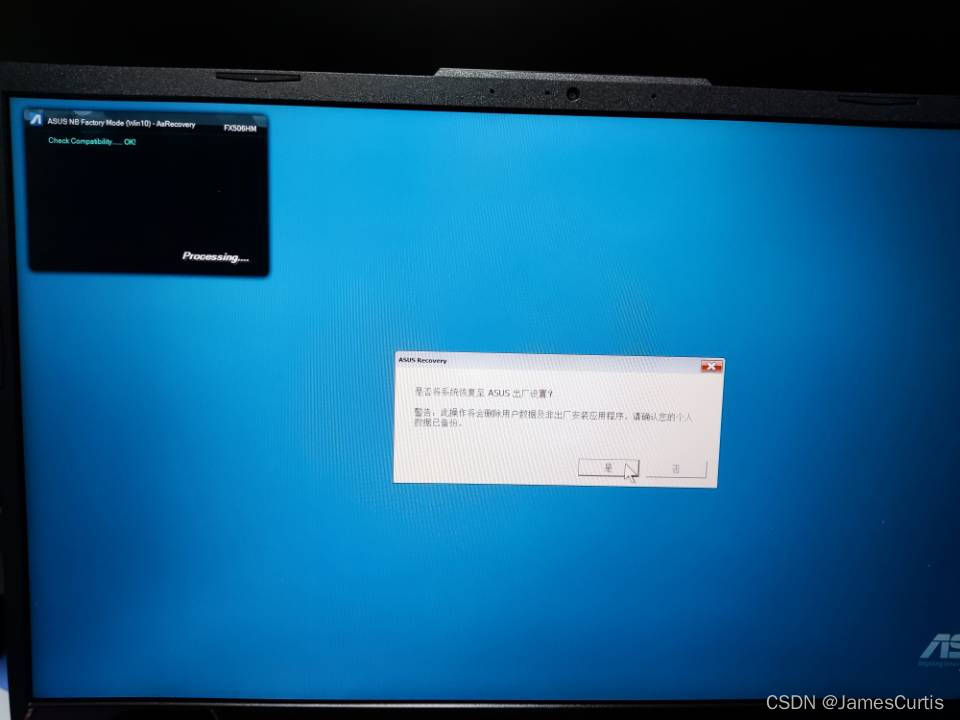
Reset your system.
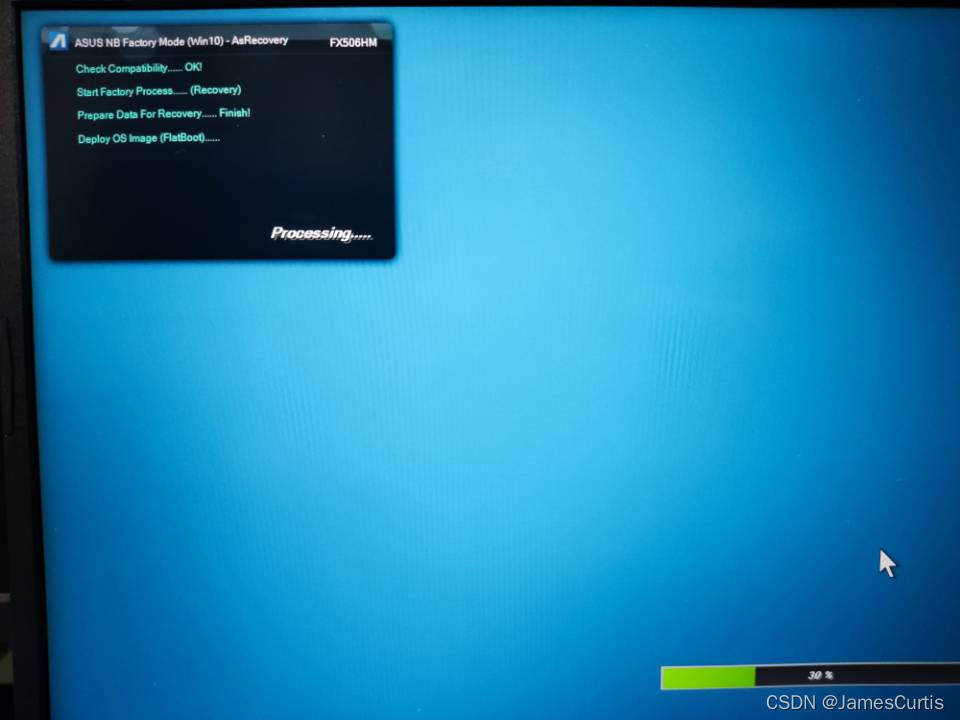
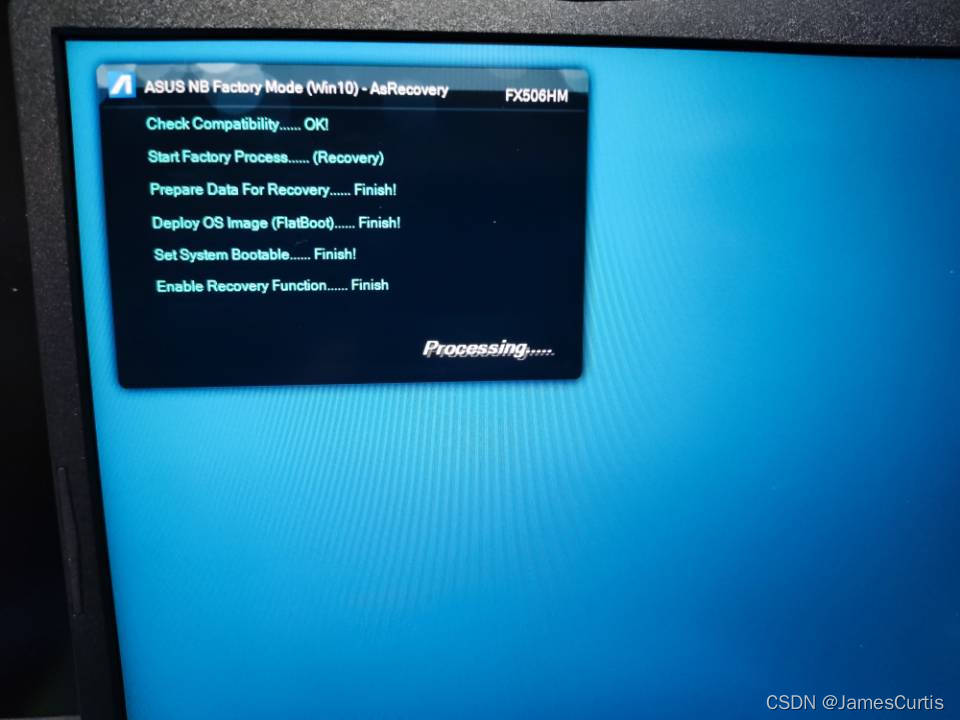
Your system should automatically restart, and at this point, quickly insert your USB drive. While restarting, continuously press F2 to enter BIOS, and then press F8 to enter PE.
Once in PE, delete the logs generated by ASUS recovery in the RESTORE partition. These logs are located alongside asus.sum. Delete the two log files (you can also use DISM++ to restore from backups; I deleted them for testing ASUS recovery).
Now, you can use AoMei Backupper to back up your entire hard drive.
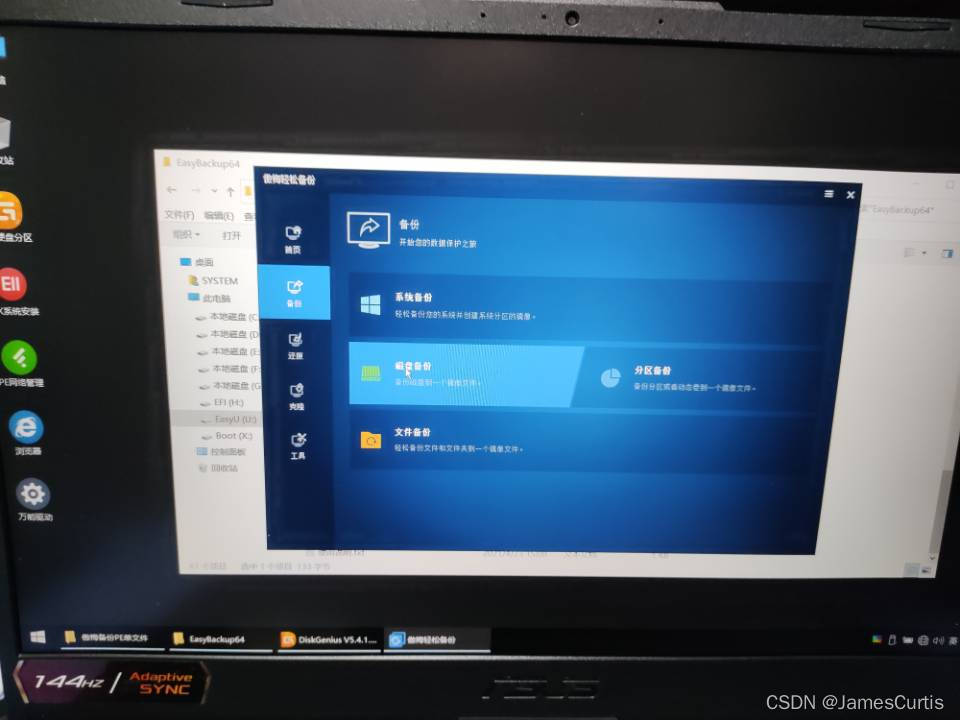
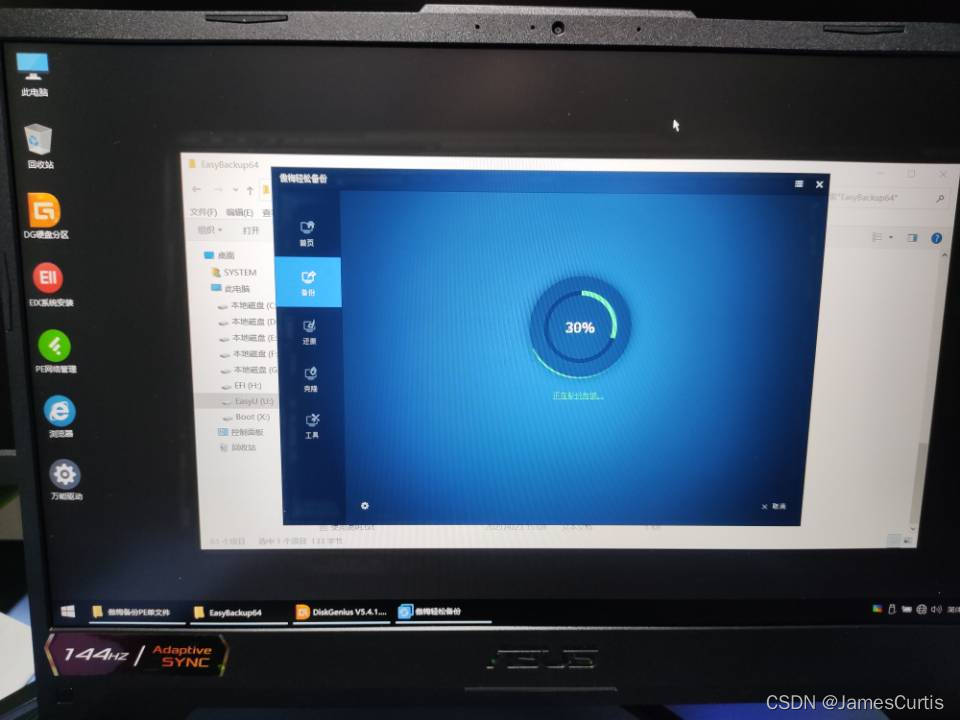
That concludes the tutorial.
References:
https://tieba.baidu.com/p/7221452991
http://www.360doc.com/content/20/1010/01/70092632_939674035.shtml
Materials:
Partition Table: Partition Table.zip - Lanzou Cloud
MYASUS Image: MYASUS.zip - Lanzou Cloud
The RECOVERY image and RESTORE are too large, one is 1G, and the other is 15G. I will upload them slowly.
January 4, 2022, 18:07:39
Link: https://caiyun.139.com/m/i?005Cj0oBCE8As
Extraction Code: bHT7
Copy the content, open it with the Caiyun PC client for easier operation.
1 | File: F:\RESTORE.pmf |